Begin with one real batch
Picture what will go on the trays next week, not the broad and handsome future in which you dry every tomato, mushroom, apple, chile, herb, and strip of meat that crosses the threshold. A few bunches of herbs ask for different capacity than a garden’s worth of fruit. The useful machine is the one that fits the work you will repeat and the counter, shelf, or cupboard where it must live between batches.
Write down three likely jobs and find a current, tested method for each before shopping. Note its preparation, temperature, drying cues, conditioning or storage steps, and whether the source permits an oven. The National Center for Home Food Preservation describes home drying as a complement to canning and freezing and publishes food-specific guidance. The method should set the equipment requirements, not the photograph on the box.
Compare usable tray space, not tray count
Six broad trays may hold more than ten small ones. Compare the dimensions of the drying surface, the clearance between loaded trays, and whether the full set can be used for the food you have in mind. Fruit leather needs compatible solid sheets; whole herbs and thicker pieces may need more vertical room. Ask whether trays can be removed without disrupting airflow or violating the manual.
Then stage the batch on an ordinary cutting board. How much slicing and pretreatment is involved? Where will the loaded trays wait? A machine with heroic capacity can simply move the bottleneck to the knife, sink, or refrigerator. Capacity is useful when the prep space and harvest can keep up with it.
Airflow changes the daily work
Look for the fan location and the maker’s loading instructions. A rear-mounted horizontal fan pushes air across the trays; stacked vertical-flow designs move air up or down through them. Neither label excuses you from reading the manual. Ask whether the maker expects trays to be rotated, how tightly pieces may be arranged, and what happens when one tray is removed.
Doors and clear panels can help you inspect a batch without pulling apart a stack, though visibility does not replace the method’s doneness checks. Listen for noise information if the machine will run near a desk or bedroom. Drying takes time. The dehydrator will become a temporary housemate, and it is not known for conversation.
Temperature control must match the method
An adjustable thermostat and timer are useful only if their range covers the validated instructions you plan to use. Compare the stated minimum and maximum temperatures, adjustment increments, timer duration, shutoff behavior, and what the machine does after a power interruption. Read the manual for warm-up, loading, ventilation, and unattended-use limits. Do not assume that a displayed temperature proves the air and food have followed the same path.
Herbs, fruits, vegetables, fruit leather, and jerky are not one interchangeable program. Some vegetables require pretreatment; fruits may need conditioning after drying; meat and poultry introduce a different safety problem. Keep the complete method beside the machine and record the food, slice thickness, load, settings, start time, end cues, and storage plan. The notes become much more useful than remembering that one batch took ‘most of the afternoon.’
Jerky needs a complete safety process
USDA’s Food Safety and Inspection Service warns that simply putting raw meat or poultry into a warm oven or dehydrator can allow pathogens to survive the drying process. Use its current jerky guidance or another validated extension method from beginning to end, including the required heat treatment, handling, drying, and storage steps. Do not substitute the appliance’s maximum temperature for the procedure.
Keep raw-meat preparation separate from foods that will not receive the same treatment. Clean hands, tools, trays, counters, and the machine exactly as directed, and use a suitable food thermometer where the validated method calls for one. If a manufacturer’s recipe conflicts with current public-health guidance, pause and use the authoritative method rather than trying to split the difference.
Make cleanup and storage part of the comparison
Tray material affects weight, stiffness, staining, and cleaning instructions. Check whether the trays, screens, drip surfaces, and fruit-leather sheets are removable and whether any part is dishwasher-safe. Fine mesh can hold small herbs and sticky fruit with equal enthusiasm. Replacement trays and sheets matter more than an accessory bundle you cannot identify six months later.
Measure the machine with its door open and allow the clearances required by the manual. Confirm the voltage, plug, wattage, outlet requirements, and permitted operating surface. Think about where warm, moist exhaust will go. When the batch is finished, the food still needs to cool, be checked or conditioned as the method requires, packaged, labeled, and stored under the stated conditions. Dry-looking is not a universal promise of shelf stability.
One current large-batch reference point
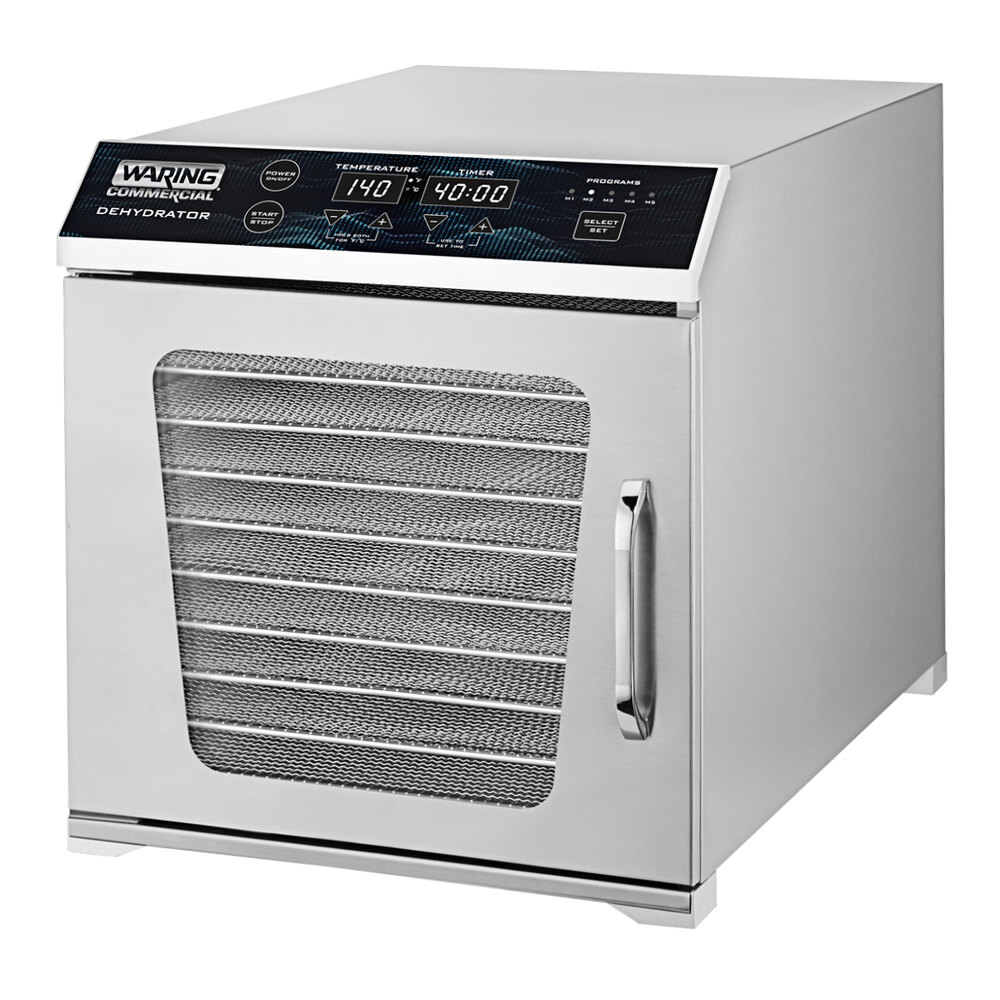
The Waring WDH10 is a useful reference for a larger, more commercial-style countertop machine. Its supplier currently lists ten 15-by-13.5-inch stainless-steel mesh trays, a rear-mounted fan, a 90–180°F adjustable range, a 1–40-hour timer, five programmable settings, 120-volt power, and NSF certification. Those are supplier specifications, not Cook Curated test results, and they do not validate a preservation method.
At roughly 14.5 inches wide, 20 inches deep, and a little over 16 inches high, it asks for real counter and storage space. That can make sense for frequent, substantial batches; it is plainly more machine than an occasional handful of herbs requires. The partner currently presents it as available for purchase, but price, shipping, electrical fit, warranty, and availability are confirmed on the retailer’s checkout page.
Buy after the first method, not before it
If a validated method allows the oven you already own and the oven can hold the required conditions, make one modest batch there first. You will learn whether you enjoy the slicing, arranging, checking, packing, and labeling—not merely the idea of them. If the work becomes regular, a dedicated machine may offer better capacity and a more practical workflow.
When you are ready, choose the smallest sound machine that handles the batch you want to repeat. Leave room for air, follow the maker’s operating limits, and let the preservation source govern the food. The goal is not to own a dehydrator. It is to put good food away safely and bring it back to the table later.